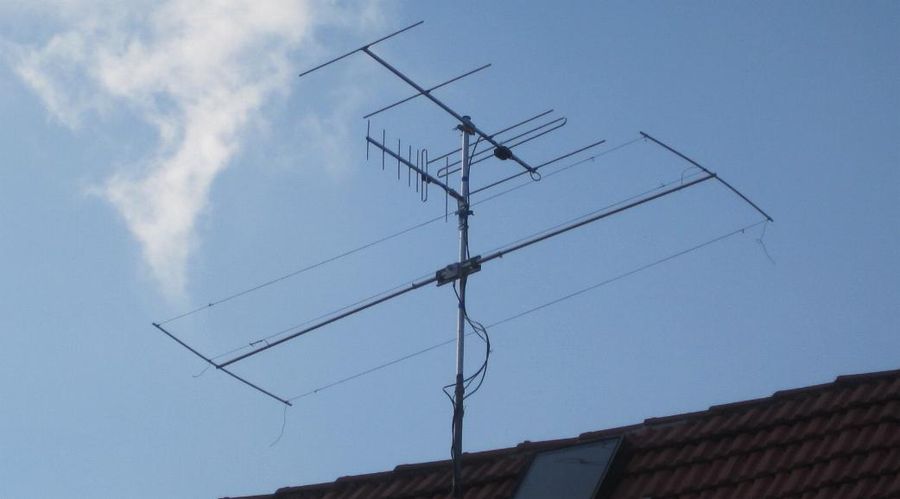
| Open-sleeve principles | VHF-Duoband principles | Duoband-Yagi 6m/10m | 10m-Dipole+ 3-El.- 6 m | Triband-Yagi 6m/4m/2m | Duoband-Dipol 2m/70cm | 2m/70cm 2+2/3 El. | 2m/70cm 4+5 El. | 2m/70cm 5+8 El. |

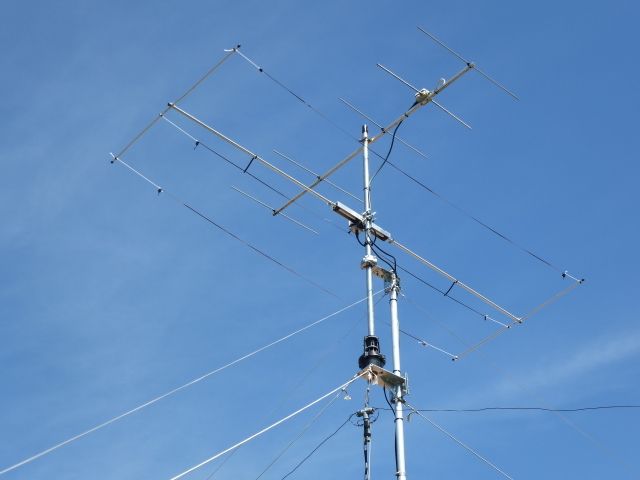 |
This is the antenna built by Bruno, F6GPC Above a 5-El.-DK7ZB-Yagi for the 2-m-Band
|
|
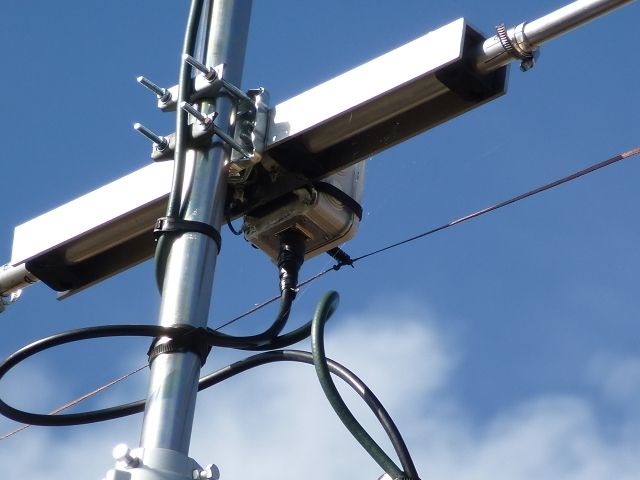
Details of the construction by Bruno, F6GPC
Important is the fixing of the open-sleeve wire with a non conductive part for avoiding vibrations. |
 |
|
This antenna is a byproduct of the engagement with capacitive end loaded dipoles [1]. It is based on a shortened rotary dipole for the 10-meter band. In this antenna a 3-element wire beam for the 6-meter band is nested. In this way we have a dual-band solution with one feed point, which is 50 Ohm for both bands. This antenna has been developed with the program EZNEC 5 [3] and is well tested.
Such a
design has several interesting properties. For the 10-meter band with a reduced
size to 2/3 of the half-wave dipole we have practically the same gain and only
slightly lower bandwidth. The feedpoint impedance is now 50 Ohm and not the 72
Ohm of a full-size dipole. As a further addition we get the attachment points
for a 3-element wire beam for the interesting 6-meter band. Power is indirectly
fed here through an "open-sleeve" element of 2-mm wire, which was
configured to have a second resonance at 50.150 MHz. The structure and the
currents in the system with feeding at 50 MHz can be seen in Figure 1. |
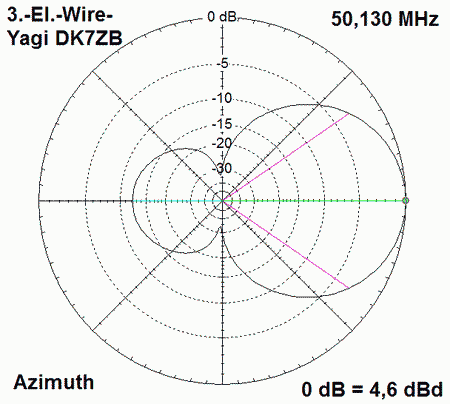
Fig. 2 |
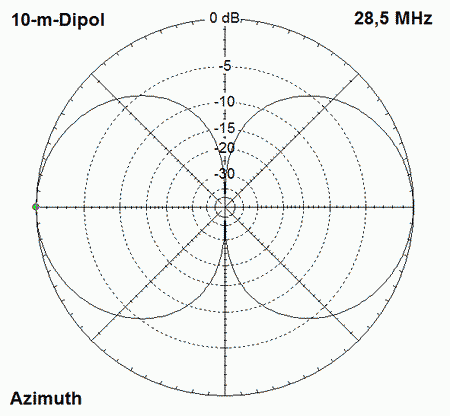
Fig. 3 |
It is
clear that the highest current occurs in the passively coupled wire (Wire 8)
parallel to the 10-meter dipole (Wire 2) and the open-sleeve element is the
actual radiator for 6 m. The horizontal pattern for 50 MHz (Fig. 2) corresponds to that of a conventional
3-element yagi with the short boom length of 0.2 lambda.This gives a thoroughly
respectable gain of 4.6 dBd and a F/B of 12 dB. At 10 m we have the
bidirectional directivity pattern (Fig. 3) of the figure eight, as
it is typical for a half-wave dipole.The mechanical construction
|
|
 |
| The
listed numbers for each section refer to Figure 1. The middle
piece consists of two 25x2 mm aluminum tubes (2), which are separated by a
fiberglass tube. The distance is about 20 mm and is not critical. With the help
of PP holders of NuxCom [4] and two pieces of aluminum angle it is fixed by an
exhaust clamp on the mast.The exact structure can be found in Figure 4.
At the centerpiece of the junction box is the connection to the balun, the
contact is made through the bottom of the box with self-tapping screws and
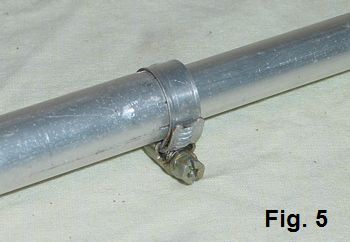
solder lugs.The ends of the inner tubes are shiftable (Fig. 5).
So you can move the 20-mm tubes (1, 3) for fine adjustment and tighten them then
with a hose clamp. At the end of these pieces is a 12-mm cross-drilled hole and
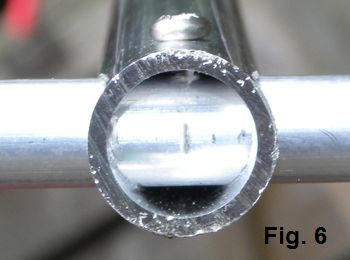
in these the 12x1 mm aluminum tubes of the end capacity (4, 6, 5, 7) are fixed.
Locking takes place with self-tapping stainless steel screws (Fig. 6). The
reflector has a distance of 580 mm (relative to the center of the
10-m-dipole-element). To be drilled into the 12-mm-tubes of the capacitive load
are 3mm holes and the 6-meter reflector is fixed with not lenghtening Kevlar or
Dyneema rope. The same is done with the director, which is in 615 mm distance.The
open-sleeve-wire in 85 mm distance is first tied with the insulating
rope on the 12-mm tube so that the attachment point is displaceable for the
adjustment of the distance. Therefore one end is connected to the inner part of
an insulation screw point. The wires must have exactly 2 mm in diameter and not
be insulated. Feeding the antenna |
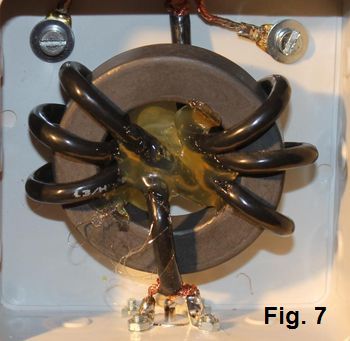 |
For balancing and common wave suppression a simple W1JR-balun is used [5]. The 2x 3 turns coax cable can be applied to a toroid core. High power up to 1 kW is possible with Aircell-5 and is shown in Figure 7 on an Amidon FT240-43. Up to 300 watts, you can also take the smaller and cheaper FT140-43, which is wound with Teflon coaxial cable RG188 (Fig. 8). | 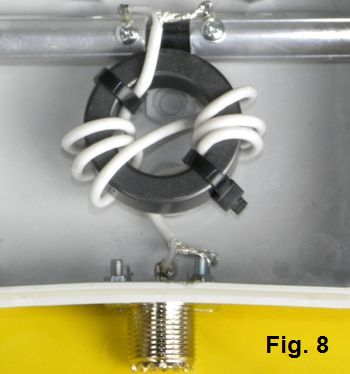 |
|
In
principle, it is of no importance for the blocking effect whether the 6 windings
are arranged in the same direction or with 2x3 diagonally (as shown).
Successfully tested was a choke from 10 turns RG188 on a PVC pipe with 20 mm
diameter, too. This fits well into an electrical wiring box. It is recommended
to solder a 2-Watt-resistor (metal oxid, 100 Kohm) across the connections to
avoid statics in the system. The coax socket should be fixed on a retaining
plate (Fig. 9) connected with the mounting brackets. With the
mounting brackets you have a grounding to the mast. Tuning the antennaFirst,
only the 10-meter dipole is built and brought to the desired resonant frequency
by the 20-mm tubes which are displaced on both sides by the same amount. As a
starting point can be assumed a length of approximately 10 mm on each side for a
change of 100 KHz. It makes sense to tune it at 28.2 MHz. It will save you the
subsequent correction, because the additional 6-meter wires raise the resonance
around 200 kHz up. With an end adjusting resonance of 28.4 MHz both CW and SSB
can be used in the segment up to 29 MHz with an measured SWR of 1.0 at 28.465
MHz. Even at 50 MHz, if the adjustment is optimal, the SWR remains in the range
from 50 to 50.3 MHz below 1.2. These works should be checked 5 m above ground. |
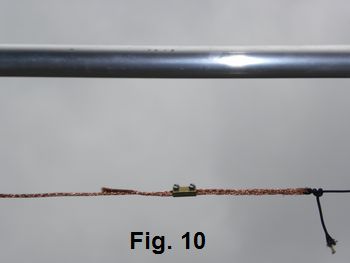 |
Then
hang in the 6-m-wires and measure the SWR at 50.150 MHz. With minimal change in
length of the open-sleeve-device (Fig. 10) and moving around in
the distance +/- 10-20 mm an accurate SWR of 1.0 can be achieved. It is
important for the wire to connect it with a strip of insulating material in the
middle with the junction box. Otherwise the movement in the wind leads to a
fluctuation in the adjustment, because the distance from the pipe is extremely
critical. Following this rule gives a long-term stable SWR.
Little moving of the
reflector and the director wires has no consequences for the impedance and the
SWR. The result can be seen in the Figures 11 and 12.
The measurement was done with 8 m of Ecoflex-10 and a vectorial antenna
analyzer. |
| Results
The
antenna is located now at DL2FBY and over a year in operation.
The result exceeded the expectations on both bands. With an output of 15 watts,
the Yagi produces the maximum of the allowed 25 watts ERP at 50MHz with the
insertion losses and the antenna gain. During ES-openings QSOs all over Europe
could be made, even 2-hop contacts to 4X and JY. At 10 m corresponds the result
to a high-mounted and free dipole, here is the rotatable arrangement a positive
bonus. The
small size of the dualband-antenna can be seen in relation to a 5-element-Yagi
for 2 m with a boom length of 1,50 m. This 2-m-Yagi was developed by DK7ZB for
KONNI-Antennas in Germany. |
Table
1: Dimensions of the
Aluminium-Tubes und the Copper braids
|
Parts
(Fig. 1) |
Materials
and Lenghts |
|
2 |
2 x
290 mm, 25 x 2 mm Alu-Tubes (or 1’) |
|
1,
3 |
2x
1370 mm, 20 x 1,5 mm Alu-Tubes (or 0,75’)+
additional 150 mm for shifting |
|
4+6,
5+7 |
2 x
1240 mm, Alu-Tubes 12x1,0 mm (or 0,5’) |
|
8 |
2-mm-Copper-braid,
Length 2830 mm |
|
9 |
2-mm-Copper-braid,
Length 2960 mm |
|
10 |
2-mm-Copper-braid,
Length 2600 mm |
|
Sources: [1] Steyer, M. (DK7ZB): 50 Ohm reelle Antennenimpedanz dank gewinkelter Dipole, FUNKAMATEUR (61) 2012, Heft 4,
S. 390-392 [2] Steyer, M. (DK7ZB): Minibeam für zwei Bänder, CQ DL 5/2012 [3]:
Program EZNEC+ Ver. 5.0.58, Roy
Lewallen (W7EL), P.O.Box 6658, Beaverton, OR 97007, USA
(e-Mail w7el@eznec.com), http://www.eznec.com [4] Nuxcom Antennenbau, Attila Kocis Kommunikationstechnik, Am Berg 7, 96253 Untersiemau,Tel. (0 95 65) 616472, www.nuxcom.de [5] Krischke, A. (DJ0TR/OE8AK): Rothammels Antennenbuch, 12. Auflage, Abschnitt 18.1.2.3, DARC-Verlag Baunatal |